Labels

Friday, 31 May 2019

May 2019 finishes and WIPs

It's been a busy month which has been book ended by the boys being on school holidays. They only have 7 weeks left when they go back before the end of the school year - when did that happen??

So what have I been up to this month? As I did in April, we'll start with the finishes...


There has been a fair amount of knitting a couple of cards and some sewing all completed this month. First up is the unicorn birthday card I made for my niece who turned 5 this month. She loved it and my sister sent me a lovely video of her opening it. I did have a moment where I felt a little guilty for having coloured it in though and may well add in a picture for her to colour in too next time. Later in the month one of my neighbours lost his mum. She was 99 years old and had been unwell for a time, so it was expected but I still think it's important to mark it in some way and let their family know you are thinking of them. so I made a card with a simple lily design - I believe the thought was appreciated.

Knitting wise I finished the test knit for Craft it like Katie and if you fancy the pattern I believe it is going to be released shortly. It's a fairly straightforward knitting in the round project (no sewing up, yay!) and I had great fun making the pompom, reminiscing with Master L about how we used to make them when I was at school. I went old school with making the pompom too as I don't have one of these fancy pompom makers you can get now - it took a little while but I was pleased with the result. I also started (and finished) a jumper for little Miss which matches mine as I'd over-estimated the amount of wool I needed for mine and had a good 250 grams spare. It's turned out well and she absolutely loves it. When she's wearing it she strokes the front over her tummy saying "mine" - so cute!

I have also finished the Bambi themed baby quilt for my cousin's first baby who is due to arrive in a couple of months. The plan is to give it to my cousin at her baby shower so as she hasn't seen it yet, I'm only giving a sneak peak. I'll be releasing a blog post after the baby shower though with more details (and pics). It's been a labour of love at times with it being English paper piecing, but I have to admit I've really enjoyed doing it and am so, so pleased with how it has turned out - hopefully my cousin will be too.


I also want to add in here something that Master L has made as his teacher appreciation gift this year. I'm really proud of him as he did it himself (with a little guidance from me) and he has done a fantastic job. His stitching is really neat and I would definitely encourage people to let their kids have a go at some of the more complex crafts - they may just surprise you as he did me. Isn't it fantastic? It's a mug rug (albeit a slightly larger one) and as his teacher is quite in to things like that I'm positive she will love it.

OK, so on to the works in progress. I'm still going with the Lake Baikal cross stitch and am now almost half way there. The plan is to get to halfway by the end of June which at my current rate should be more than achievable. I just need to master the French knot. I've found a useful YouTube video so fingers crossed I'll crack it and if not my hubby has successfully managed it so he can do them 😂😂😂


I'm working on a bookmark for Master G's teacher for the end of the yearn (I fully expect this to be finished in June ready for July). I saw the concept on Instagram somewhere and tweaked it to suit my crafting abilities. Master G likes it and feels his teacher will so I'm happy with that.


I've also started work on a 'virus' blanket using the final lengths of yarn leftover from making mine and little Miss's jumper (yes, even after knitting up 2 jumpers I still had some leftover ha ha). I've bought 2 additional colours of yarn to add to it and am working it up with an 'ombre' effect. It's looking really nice, but this one isn't to keep - assuming I can get it away from little Miss. This one is going to be for sale when finished and will hopefully be the start of my new business. I have a number of ideas that I;m working on for this so I guess the business itself is a 'work in progress'. I'll keep you posted on that one 😀

Well that's us all up to date for the month.

Until next time,

M x

Friday, 3 May 2019

Cushion cover tutorial

As if it's been a week already! Time is literally flying past this year and even though I'm having some really productive days, I can sit down to write a blog post and wonder what I've actually achieved in the past week.

I've been carrying on with my two works in progress and am adding another to the pile at the weekend as I'm doing a test knit for the fabulous Katie from Craft it like Katie. Have to admit I'm really excited about it; it's my first time doing a test knit for someone other than myself (can you do a test knit for yourself?) and I'm hoping that it will help me develop my knowledge and skills even further as I offer to do more.

So for this week, as I'm trying to save finished projects for one monthly blog post and thereby reduce the pressure to finish something every week, I thought I'd share how I made the cushion covers I finished last month.


Cushion Cover Tutorial
Step 1: I made the front of the cushion cover first by cutting eight 2.5 inch wide strips and two 1.25 inch wide strips of the fabric I wanted to use. Each of the strips was 18 inches long. Using a 0.25 inch seam allowance I joined the strips together along the longest sides in the pattern I wanted for the front of the cushion cover. I then did a line of top stitching on either side of the fabric strips to give the impression of quilting without actually quilting the cover. The final measurements for the front cover were 18 x 18 inches


Step 2: I then constructed the back of the cushion. I cut out two panels to create the envelop backing: these were 18 x 13 and 18 x 14 inches. I turned a small double hem and top stitched two rows of stitching to secure. I used two rows as I prefer the way this looks and I also find that it stops any curling of the edges. I'll confess that I didn't press the hems before sewing them (I was being very lazy) but I'd recommend that you do this before stitching - it gives a cleaner edge and can often make it easier to sew too. 


Step 3: I then pinned the three pieces of the cushion, right sides facing, together. You will have a reasonably sized overlap on the back of the cushion with the two pieces of fabric that form the cushion back. When pinning you need to make sure that all the raw edges are together, and the two hemmed sides of the cushion cover back are towards the middle to create the opening. (stupidly I didn't take a photo of this step). You then sew all the way around the cushion cover with a 0.25 inch seam allowance. 

Step 4: Finally, very carefully trim the corners of your cushion cover (inside the seam allowance) removing a small triangle at each corner. Turn your cushion cover the right way round and voila! A finished cushion cover of your own creation 😀


Right that's me for the week. I'm off to carry on with my works in progress and plan something exciting that I'm hoping to launch in the next few months. Have a great weekend, a fabulous week and I'll see you next Friday.

Until next time,

M x 

Friday, 26 April 2019

April 2019 finishes and WIPs

Hi! It's been busy this month with 3 birthdays in the house: little miss turned 2, Master G turned 10 and the hubby celebrated the big 40. That combined with Easter and the school holidays has made for a rather hectic household. I've still managed to find some time to do some crafting though. First of all, lets look at the finishes...

Please ignore the state of my kitchen
walls; we're mid refit
I don't know about you, but I really struggle in high street stores and supermarkets to find a card that I like nowadays.  If I do they seem to be pretty expensive for what is, realistically, a mass produced card. I don't mind paying a little extra for a handmade card from one of the many fabulous sellers that are around, but I quite often leave it too late and end up making my own. With birthday cakes, I usually have a request put in from the person whose birthday it is for my triple layer chocolate cake, and little miss A loves to help. I totally messed up with her birthday cake and forgot to add in the cocoa powder so she ended up with a triple layer jam sponge with icing and sprinkles on top. It still tasted good 😀


I've also (finally) finished the cushion covers that I started back in November last year. The fabric for the front of the pillows is from a pack of fat quarters I've had for a few years and used in a couple of other projects including a quilt for my bed and a sewing machine cover. I picked up the fabric for the back a couple of months ago from Hobbycraft. I've created a faux quilted front which I've then attached to the backing fabric to create an envelope style cushion cover (no zips, woohoo!). I'm pleased with the results and happy to finally have covered pillow inserts on my bed after having them uncovered for so long.


For work in progress (or WIPs), I'm still plugging away on the Lake Baikal cross stitch and making some good progress, nearing half way now. I've been pretty tired of an evening this week as we've been busy making memories during the day so I've been working more on my other WIP, the gorgeous new baby quilt I'm making for my cousin who is due in July.  It's a little easier on the brain as I can just add a few hexies of an evening and I don't need to read a chart or check I'm using the right colour thread like I do with the cross stitch. Baby is due in July so I also need to get my skates on with it!


I shared this photo on Instagram last weekend and was overwhelmed with the response it got. The fabric is super cute and I can't wait to show you all the finished quilt although that may be a little time yet (hopefully before baby makes their appearance though).

So that's us all caught up.  I'm off to play with the kids  now that the sun has reappeared after a wet and miserable day yesterday.

Until next time,

M x

Friday, 29 March 2019

Getting kids into crafting

People often ask me how I got into crafting - for some the complexities of knitting, crochet and embroidery just seem a step too far and when I tell them I've been doing it since I was small they can be quite surprised. I have such fond memories of learning to knit, sew and crochet with my Nanna and have always found it such a great way to relax, even managing to squeeze in a bit of cross stitch whilst at university (when I thought I was soooo busy and just didn't have time for stuff - how I laugh about that now as a parent!)

My eldest 3 years ago when
he first learnt to knit
I think the impression that knitting etc. is something that the older generations do is starting to be displaced, but it was certainly prevalent up until a few years ago. The advent of programmes like The Great British Sewing Bee and Kirstie's Handmade Christmas has definitely helped to make crafting cooler as well as being able to source so many different fabrics and notions online. You certainly wouldn't have found cross stitch charts for the Avengers and Harry Potter when I was a kid! (Now I've found these I'm kinda desperate to get one of each, but I'd better finish my Lake Baikal first). But there can still be this thing about boys doing knitting, sewing etc. as it's still deemed by some as being a 'girl's hobby'.

Not in MY house!! Don't get me wrong, we have the typical boy activities (LEGO, so much Lego) but I guess because the boys are so used to seeing me with a needle or hook of some description it has
sparked their interest. I taught both boys to knit a little while ago now and while they haven't got past the knit stitch, they are both pretty competent in it. More recently though they have got into cross stitch.  It's a fairly simple craft to learn, after all it's essentially just sewing a load of crosses, and it can be quite quick with some of the smaller charts and projects you can buy.

Both boys have recently finished a project and Master L took his in to show his teacher this week. He is clearly proud of what he has achieved, as he should be. he has now started a much bigger project and the really wonderful thing is that he too finds it relaxing. He struggles with his behaviour sometimes, nit always making good choices and I've noticed that he is so much calmer when he is absorbed in his stitching. Such a bonus.
Master L's cross stitch project part way through and the
finished article

I'm not daft and I strongly suspect that in a few years when the boys are teenagers they will laugh at me if I suggest they make something. BUT I do hope that, like me, they return to it in the future and pass their knowledge on to any children they may have. I am so looking forward to being able to teach little miss how to knit, crochet and sew. For now we will stick with the simpler activities like painting and sticking, making good use of suggestions that I find on blogs such as the wonderful Red Ted Art.

How about you? What got you into crafting and how do you encourage your children to join in?  Is it a case of 'monkey see, monkey do' or are you a bit more proactive with it?  Let me know in the comments here or via Facebook or Instagram.

Until next time,

M x

Friday, 22 March 2019

Finished project - March

Hurray!! I have a finished project to share with you 😁 It's the long awaited (by me at least haha) jumper that I knit in the round from the bottom up using a pattern I converted. As I've mentioned previously, this is the first time I've knit a jumper in this way and while there have been a small handful of issues I've had to overcome, I'm so so pleased with how it's turned out. Added bonus that I even have enough yarn left over to make a matching one for my little girl (at almost 2 mummy still
has some control over what she wears and what could be cuter than matching hand knit jumpers?

So, a summary of what went well and what went not so well (i.e. what mistakes I made that I had to very swiftly learn from)...

I started off with the body of the jumper and very quickly made a common mistake : I twisted my cast on row when I joined my knitting to knit in the round. The worst thing was I didn't actually notice until I'd knit 4 or 5 rounds of knit 1 purl 1 so I was pretty cross with myself. Still, mistake corrected (nothing like starting all over again to build  on your skills) I happily completed the body section up to the part where I would add the arms. Once the ribbing is complete it's a straightforward stocking stitch which when knit in the round is just the knit stitch over and over - bonus as I'm quickest at the knit stitch! When I was almost done though, I realised that I had dropped a stitch which had undone quite a way down so out came my trusty crochet hook to fix the problem. It's frustrating when these things happen, but the fix is fairly simple once you know how.

The arms knitted up reasonably quickly and I was pleased with how they came up. The experienced eye can see where I've done the increases, but the hubby who can't knit assures me that the untrained eye can't tell and to be fair, from a distance I can't tell either so I'm happy. For my first time using double pointed needles they really did come up well. Then came the bit I was excited about and dreading in equal measure; the yoke. This is the section where you join the arms and the body 'tubes' together to make one big tube. I was surprised at how easy it came together in the end. I popped live stitches onto safety pins (these are where the body meets the arms at the underarms) and merrily knitted all the way around the 360 plus stitches in the new round.

Look closely and you can
see one of my loom bands 😂
It's all about decreasing from then on to the neckline, forming the raglan to the shoulders as you go. I used loom bands (yes! loom bands) as stitch markers as that's one thing I don't yet have in my stash
of knitting paraphernalia and I'm clearly too impatient to wait until I get chance to pick them up. It's not ideal though and I wouldn't necessarily do that again as they have a tendency to slip under the stitches and that kinda goes against the whole marking your place thing... Anyway, once or twice I realised the loom bands had shifted and had to undo some stitches to correct the raglan which was frustrating but not the end of the world. The biggest issue for me here was two of the balls of yarn I was using ended in massive knots. but I persevered and overcame (I was not going to be beaten or waste yarn!!)


Working the short rows around the neckline blagged my head a bit and I had to refer to trusty old YouTube to remind myself of the best way to do it. Once I'd got my head around it though, I was off on the final stretch before working on the collar. Knitting the rib for the collar was painful. I was so close to the end and there aren't even that many stitches in those rounds, but OMG I just could NOT get them done fast enough.  I cast off last night and quickly tried it on (still with the underarm stitches on safety pins) and it fit great.

This morning, I used the kitchener stitch to graft the live stitches together, slip stitch the collar to the inside to give a rolled collar effect and sewed in the ends and that's it. One completed jumper with absolutely, positively NO sewing up!! Normally, the completed parts of the jumper (sleeves, front and back) would sit around for weeks while I conjured up the impetus to sew them together and finish up but I have none of that this time and will happily be wearing it tomorrow. Yippee!!


Now for the fun part of typing up the pattern instructions from my roughly scrawled notes whilst wearing my new snuggly jumper. I'll certainly be giving another one a go and planning out some tweaks to add some more detail to the jumper.

Until next time,

M x


Friday, 15 March 2019

Homemade crispy pancakes

Urgh, don't you just hate it when household appliances go wrong? I've had a split hose on my vacuum and a leaky washing machine. Luckily both have been an easy (and cheap) fix, but it is frustrating when things like this happen. Especially with a family of 5 as the washing mountain soon became huge while we waited for the new part.

Anyway, in the world of crafting I've been having lots of fun gaining inspiration from Instagram and  a new blog I found: the barefoot crafter. In her most recent blog post she has made the cutest little clutch bag and now I'm planning on something similar but to hold the basics for little miss. As she's almost 2 now (where did that go??) we don't always need a full change of clothes and numerous clean nappies etc. but my handbag is simply not big enough to carry the extra couple of bits I need some days.  I want to make something that suits all purposes but isn't as big as a changing bag, as bulky as a rucksack or as easy to tip out as a tote. My main issue at the moment though seems to be a severe lack of time to craft now that little miss has decided she no longer needs a midday nap.

One thing I remembered after clicking post last week was that I'd been a little more adventurous this year for Shrove Tuesday. Instead of sticking with my old staples of syrup and lemon and sugar as toppings, where I keep pancakes just for pudding, I decided to give my very own crispy pancakes a whirl. I remember eating these as a kid and while they are still available, I haven't been able to source my all time favourite cheese filled ones in my local supermarkets.

Image result for crispy pancakes
Picture credit - Google images
I've made crispy pancakes once before so I knew what I was up to, and yet I still found it took me ages (that may have been because I had some *help* or it may just have been my very old and temperamental oven). I think with a little more preparation beforehand though such as making a large batch of bolognese/cottage pie/cheese sauce or whatever your chosen filling is would cut down the length of time it takes. According to the husband it would also be easier with ready made pancakes but for me that's cheating (no shame though if that's how you roll).


So, in case you fancy it, here's the how to...

Ingredients:
100g plain flour
2 eggs
300 ml milk
oil
egg wash (I used 2 eggs)
breadcrumbs
your chosen fillings

1) Put your flour in a bowl and make a small well in the centre. Add your eggs and about half the milk and whisk until smooth. Then add in the rest of your milk and whisk again until you have a smooth consistency reminiscent of double cream.

2) Make your pancakes by frying in a little oil, turning once the pancake batter starts to bubble or the mixture appears to have 'set'. You should be able to lift the edge with a fish slice and can check how golden brown the pancake is. You can toss your pancake to turn it or play it safe with a fish slice. Cook as many pancakes as you need and reserve any extra mix for pudding pancakes if you wish.

Image result for crispy pancakes
Picture credit - BBC Good Food
3) To fill your pancakes, spoon your chosen filling (you can literally choose anything and I'm sat here now thinking about making some ratatouille ones) onto one half of the pancake, fold the pancake and then using a little of the egg wash, seal the edge. You can then dip in the egg wash making sure top and bottom are coated and then do the same in the breadcrumbs. Place onto a baking tray.

4) Once all your pancakes are filled and coated,  bake them in a preheated oven (190C/ Gas5) for 15 mins and voila, scrummy crispy pancakes just like Findus used to make. We had ours with chips and beans, but salad and potatoes would work too, or potato waffles and peas, whatever you fancy 😁 These can be frozen too so you could make ahead of time, just be sure to follow food safety guidelines, particularly with your fillings.

I shook things up this time and used crushed nachos instead of breadcrumbs - OK this was born of necessity as I'm rubbish at making breadcrumbs and  Aldi didn't have any, but it worked really well  and added a nice crunch to the meal.

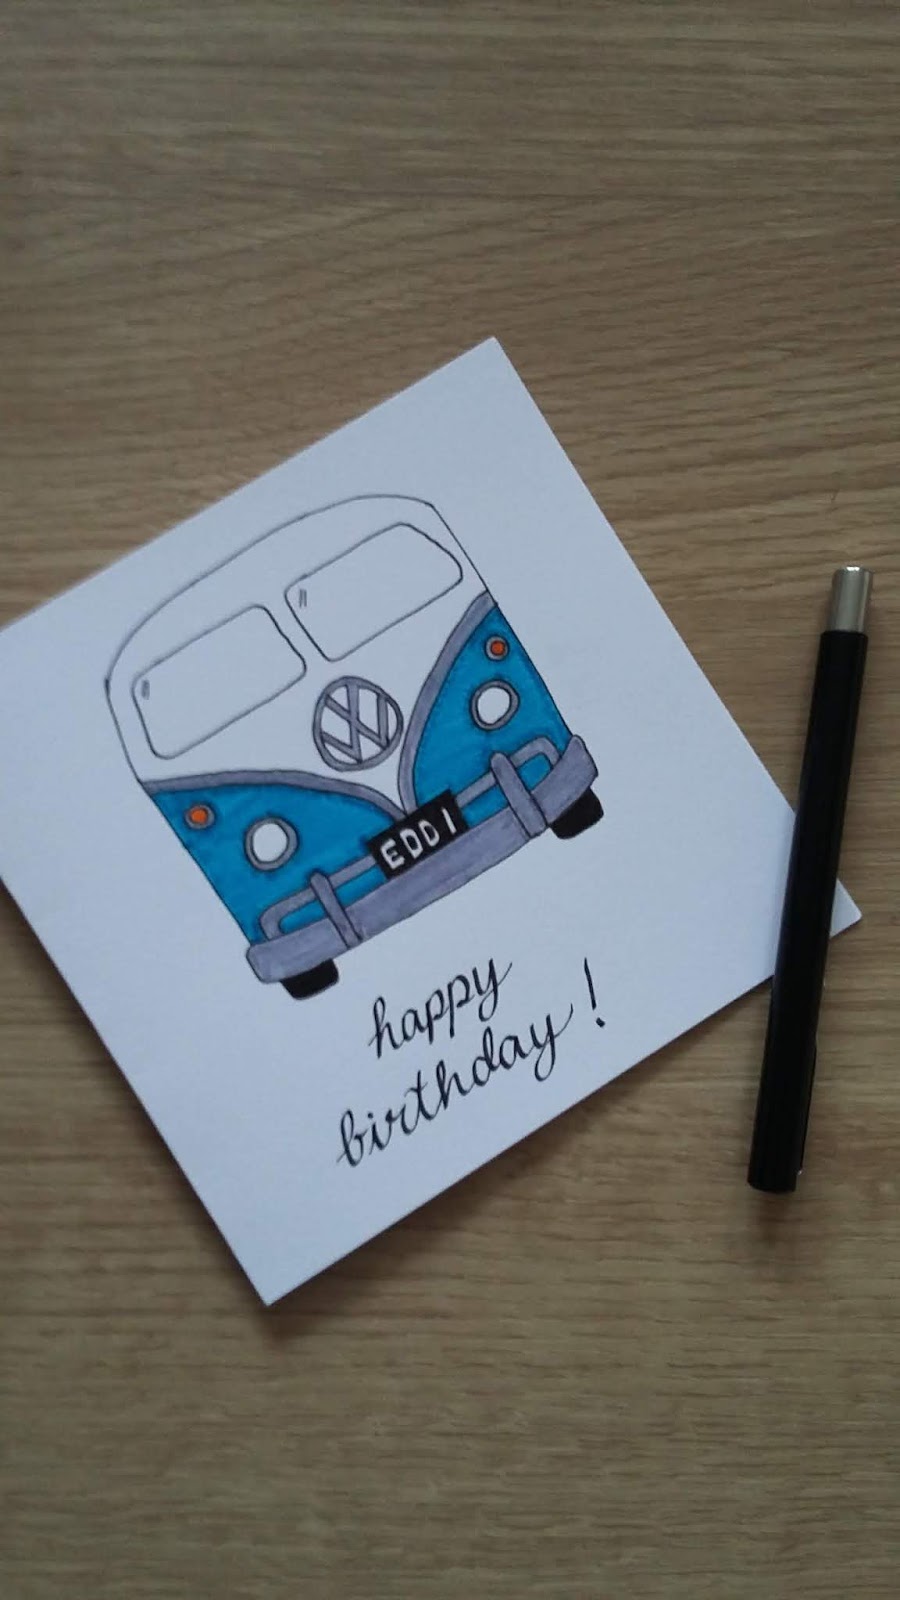
So there you have it, this weeks blog post. I have everything crossed that next week I will have a completed project to show you. But before I go, here is a pic of the card I made which I mentioned last week. It was for my lovely big brother who has been a VW camper van enthusiast for many years (although he hasn't as yet got round to owning one). I have another birthday card to share with you next week, but the recipient won't have opened it yet.

Until next time,

M x

Friday, 8 March 2019

Weekly catch up

Doors are on, just need to plumb in the
dishwasher when it arrives, add some more
worktop to the left of the cooker and move the a
cupboard and then add the new cooker. Then it's
decorating time!!
So I've been a little MIA the last couple of weeks. Basically with the kitchen refit and a stinking cold, half term for us was a bit of a right off and that cold/virus thing has lingered and I've still been suffering with it over the last week. It's left me pretty exhausted but I've still been crafting away of an evening as for me it's the best type of self-care. I'm sure I'm not alone in that.

The kitchen project is coming along nicely although we've stalled a little now as we're waiting on tradesmen to do a couple of jobs that we can't. One's on holiday and one is super busy and the day he was supposed to come his little one was poorly so I need to get it rearranged. We will get there though, and we at least have a functioning kitchen again It may be small, but for the first time since we moved in to this house I finally feel like it's the best use of the space. Washing up in the bathroom sink for 2/3 days was NOT fun though and did force us to think about what we were having to eat (so we cheated and ate out haha).


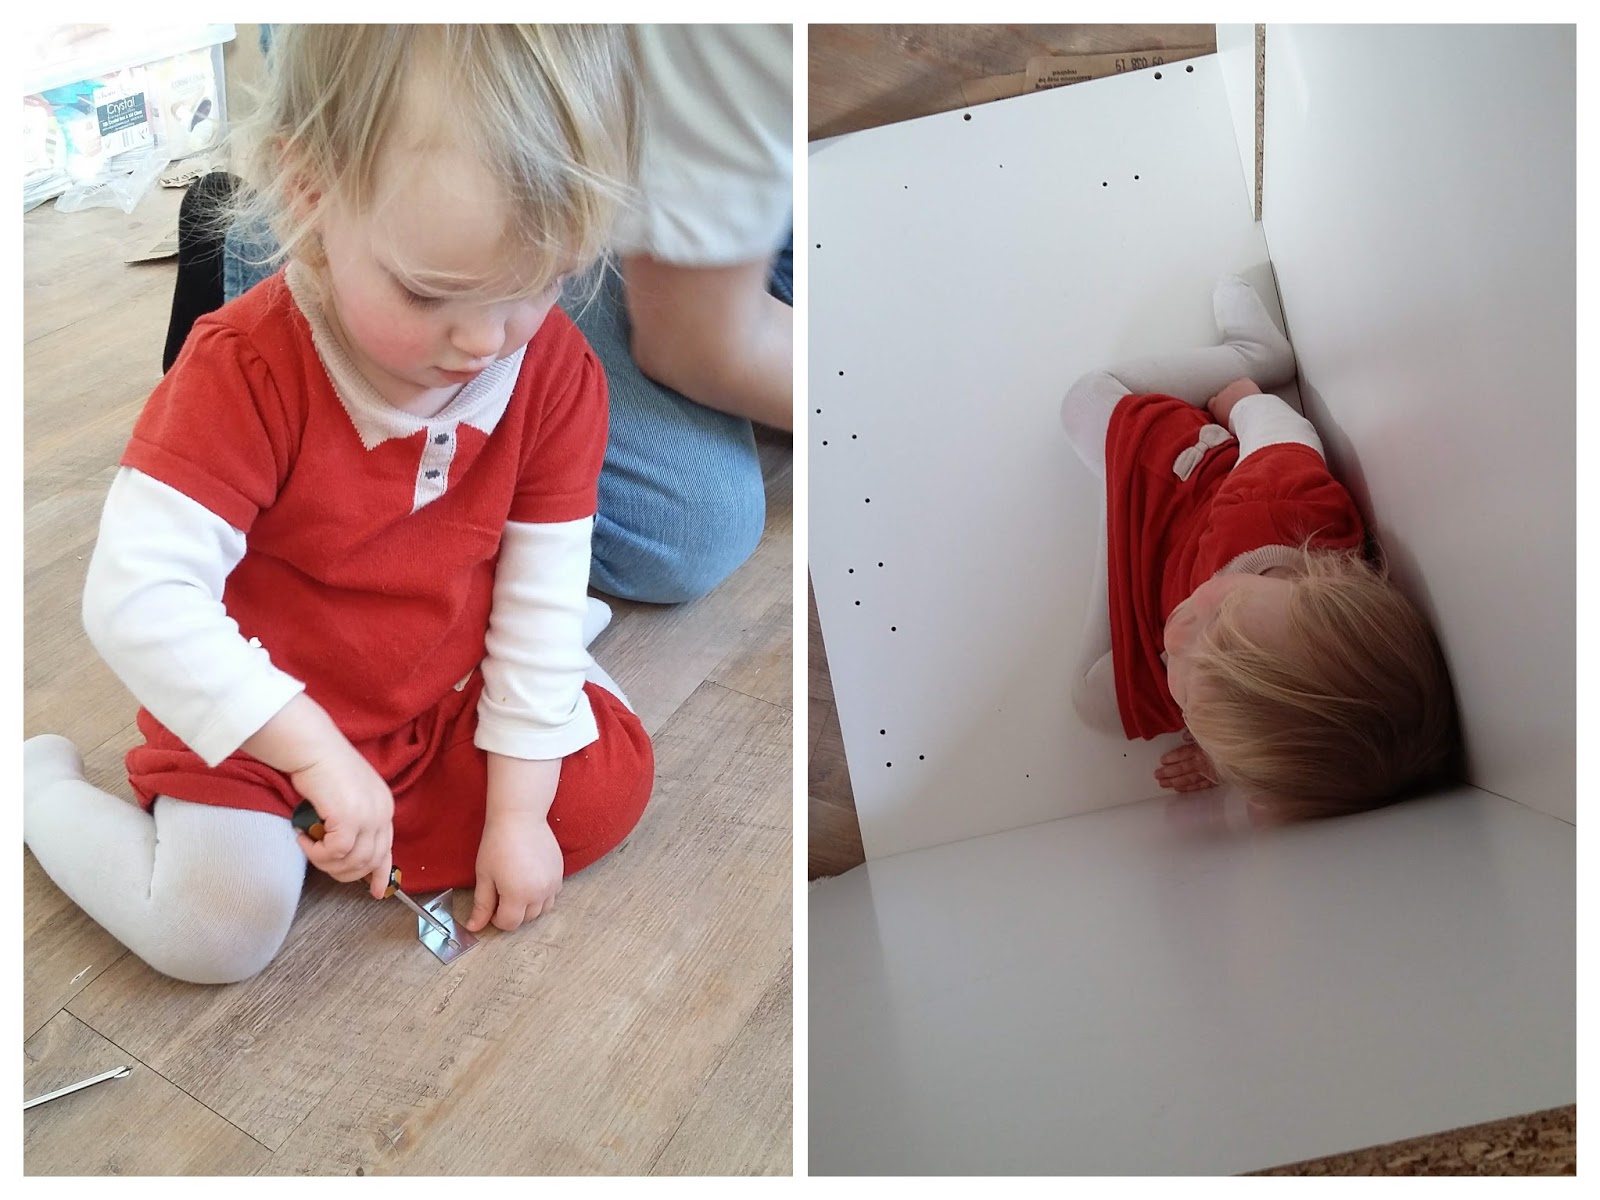
As you can see we had some help (and some hindrance) with the kitchen refit. Little miss really enjoyed getting involved and particularly enjoyed climbing into the cupboards. She was not impressed when we added shelves and put plates etc. back in!

Jumper wise I've finished one of the sleeves and have made a good start on the second sleeve. I'm reasonably tall and have long arms so I tend to add a good 2-3 inches extra to any pattern to gain the desired length. It's been fun knitting in the round though and has meant I've had more of an idea about the length as I can 'try it on'. I'm hoping to get it finished this month - just in time for the warmer days, I didn't think that one through did I? - and when it's fully completed I'll do a more thorough review and publish the pattern.

 I've been getting my cross stitch on as well and have started to enjoy it again even though it's a 'confetti' section where there is a lot of changing colours. As I've mentioned before, the size of the Lake Baikal means that it is by no means a quick project and this one probably won't be completed until Christmas time. That was the point of that project though, something I could get my teeth into  and that would last a while. Over on Instagram I joined in with the #saturdaynightcraftalong and it was great to see some other crafty peoples work. There are some absolutely gorgeous creations that really get you inspired.

I'm very conscious that I haven't had any completed projects for a little while - it feels more like I've become a serial starter rather than finisher which I find frustrating as I love the buzz I get from a completed craft project. I'm going to try and focus on completing one project a month as a minimum and then blog the highs, lows and what I've learnt along the way for those projects. That's the plan anyway! I have got one finish to show you, but you'll have to wait until next week for that one as the recipient hasn't seen it yet 😁

I'm going to leave it there for today and go have some fun with little miss.

Until next time,

M x