Labels

Wednesday 31 July 2019

July 2019 WIPs and finishes

Wow - what a month July was! Super hot here in the UK last week (bit too hot for me I'm not ashamed to admit). The boys broke up from school for the summer and I've been super busy networking on Facebook and Instagram as well as making, making, making!

Finishes

I finished a reversible quilt which is now up for sale in my Etsy shop. I machine stitched all the blocks together and finished it with some hand quilting. I love it and part of me wants to keep it, but little Miss has her own beautiful quilt already so it's up for grabs.

It's fully reversible with one side featuring some super cute animals including zebras, pandas and elephants, which make for a great conversation starter with a little one. The other side is a gorgeous Michael Miller fabric with beautiful clouds for when you're wanting to calm things down a little.

I whipped up this cute little bandana for my daughter with some leftover fabric, which she flatly refuses to wear!! I've popped it to one side for now in the hopes she may change her mind. She's so stubborn though and spends most of the time with her hair down like some sort of 'wildling' 😂

Still on the theme of hair attire, I whipped up this scrunchy - still deciding whether or not to add them to the Etsy shop...

... and I made this card for my sister-in-law for her birthday. She's an Art teacher in a secondary school. To say I felt a little intimidated drawing this would be an understatement. I'm sure she sees some amazing work from her students and I'm very aware that her artistic ability is far beyond anything I could achieve.

I also rustled up a pram blanket in a beautiful soft grey and white yarn, a gorgeous summery, butterfly print envelope cushion and a set of crochet coasters. These are all currently for sale - not yet listed in the Etsy shop, you can claim these by sending me a message on Facebook or Instagram.

My final finish for this month were samples for my Christmas products. My Christmas order book is now open and I have a 'Christmas in July' offer which ends VERY soon so if you want to grab yourselves a bargain be sure to head over to social media and let me know! These stockings are fully lined and made to my own design using fabrics that I have carefully chosen (literally hours spent trawling the Internet to find something I was happy with). They can be fully personalised to whatever name you need which is invaluable when you have a more unique name in the family.


Works in progress (WIPS)

Work continues on the Lake Baikal cross stitch. I've spent the last week thoroughly enjoying a big section of very similar colours where there are long lines of the same colour. After months of 'confetti' type stitching where I change colour every few stitches it has been refreshing to just stitch. I'm aiming to have three quarters of this finished by the end of August, fingers crossed. It has been a joy to watch this progress from plain fabric to a beautiful scene. I'm starting to contemplate my next cross stitch project and am tempted by one of the stunning Heaven and Earth Designs.

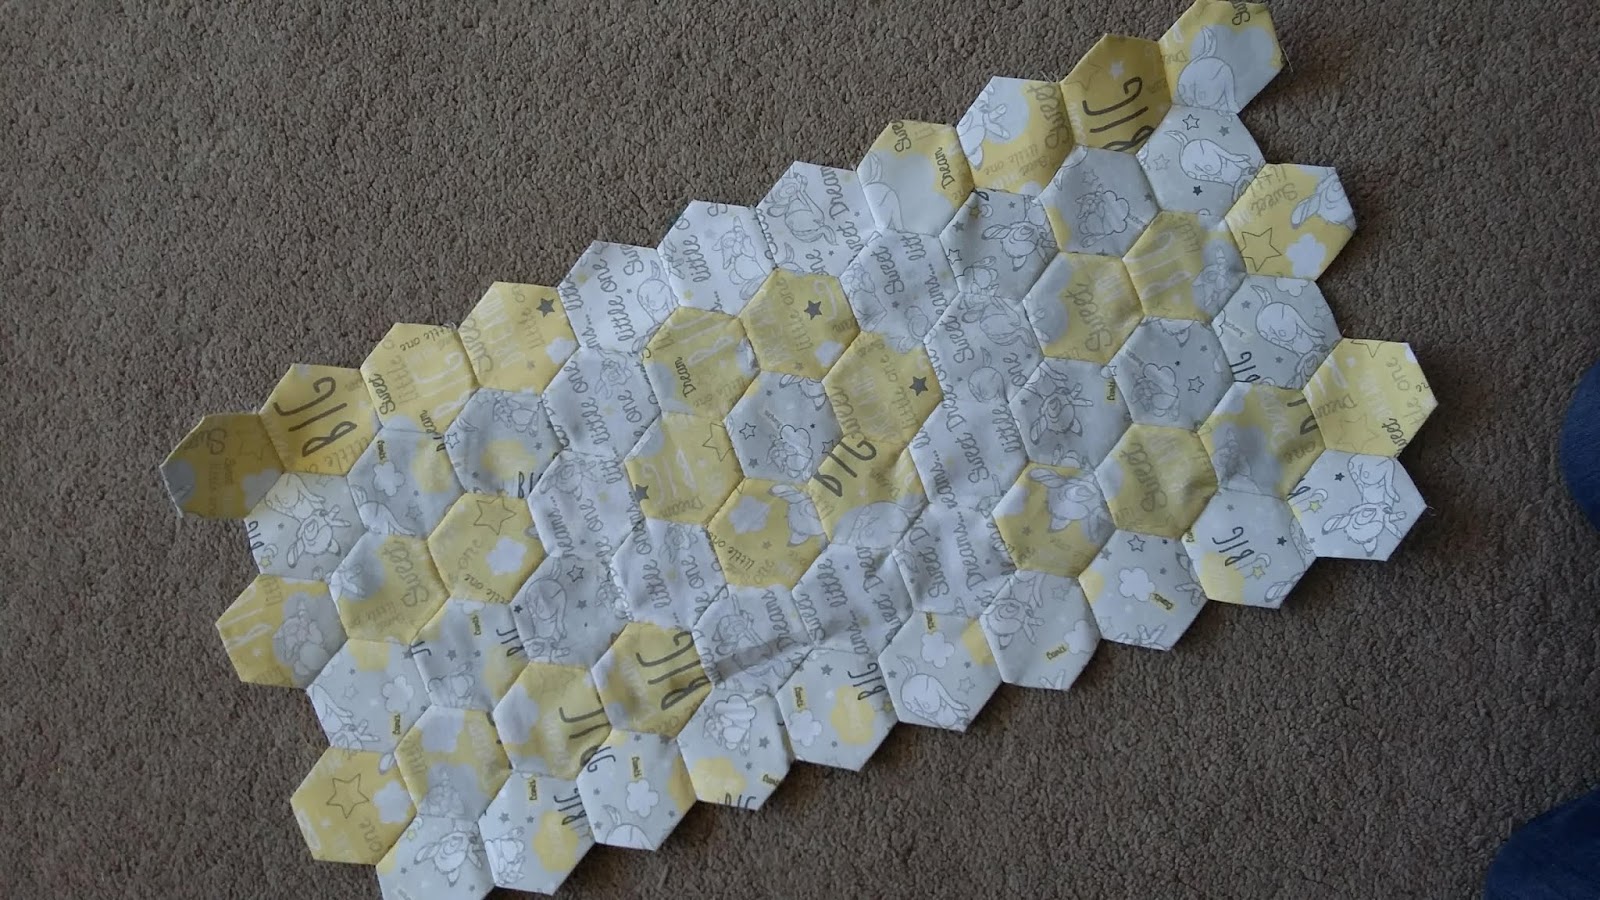
I've also started a little English paper piecing project - nowhere near the size of the blanket I made previously, but something to soothe the slow-stitching itch. I'm hoping to have this finished next month. I'll leave you in suspense about what it's going to be 😀


Until next time,

M x

Friday 28 June 2019

June 2019 Finishes and WIPs

I feel like I haven't stopped this month - I've been crazy busy starting up my Etsy shop, trying to improve engagement on social media and in between all of that creating things to sell. Some have purely been prototypes so potential customers can see what their finished product would look like and some are ready to ship.

So what exactly have I been making. First the finished items...

I finished this absolutely stunning crochet blanket. The pattern is called the 'virus' blanket and I can totally imagine a little girl snuggled under this soft and cosy blanket when they're feeling under the weather.  The change in purple hues works really well and I have to admit I am really pleased with how it came out. You can't really tell from the photos, but in the middle purple, there is an added sparkle as it's a Twinkle yarn by James C Brett. This blanket is currently available for sale on Etsy

AS you'll have seen from a previous post, I went to my cousins baby shower this month and gave her the quilt I made for her new baby. I also made her a card...

... and speaking of card making with it being fathers day this month as well as my nephew's birthday I made a three other cards:

I made some place mats and coasters for our dining room using a tablecloth that we just never used and a fat quarter of Liberty fabric that I had found in the 'off cuts' basket at my local fabric shop. They cam out brilliantly and I'm excited to make some more for customers - those ones will all be made to order. Incidentally, I mentioned I wanted to re-purpose the tablecloth to my husband and then when I went to get it I couldn't find it anywhere it would normally have been so I assumed I must have taken it to the charity shop.  I was SO pleased to find it as it was the perfect colour for our dining room.

I've made a couple of sets of bunting to add to the Etsy shop. There is this cotton 'Bambi' themed one which is currently listed in the shop:

as well as this crochet heart one which hasn't yet been listed in the shop but is ready to go.


I've also been working out some designs for crocheted coasters which I've listed in the shop - these will be made to order using the customers' desired colours and combinations of patterns.

Well I did say I'd been busy!!

Current works in progress are my Lake Baikal cross stitch and another quilt (which I'm actually hoping to finish over the weekend). I'm please to report that I'm well over half way with my cross stitch and am actually starting to think about what I  might do next. I'm fortunate enough to have received some money for my birthday so I'm thinking I can put that towards another large-ish project. The quilt I'm working on is going to be put up for sale once it's finished, but here's a peak of the fabrics for the top:

So that's me.  If you haven't already I'd really appreciate it if you followed me on Facebook and/or Instagram if you're into social media. There's a giveaway happening on the Facebook page at the moment (ends 29th July 2019) which is completely free to enter - I just wanted to celebrate it being my birthday this month 😀

Until next time,

M x


Friday 21 June 2019

Making mistakes - its a way of learning

Check out the 'to sew' pile I had going on earlier this week 😱

I had a conversation with a friend the other day over Messenger that made me (and her) giggle so I thought I'd share the story I told her with you too.

Basically the chat started with her telling me about her cross stitch she'd started and gone wrong with and how she - very cleverly - was going to rectify it and make something completely different. She thought that it would make me chuckle, which it did but as I said to her everyone has to start somewhere and we all make mistakes. Ultimately, that's how we learn.

Image result for mistakes
Picture credit: Freshbooks.com
So I went on to tell her about when I first started to cross stitch. I've mentioned previously that it was my wonderful Nanna who got me into crafting and taught me a large amount of what I know. Well after a visit to see my Nanna, my dad, brothers and Grandad I was on the train merrily doing a cross stitch of Winnie the Pooh. I'll admit I was getting a bit overly confident with it and was happily stitching away when I realised that we were coming to my station. Bear in mind that this train journey was around 4 hours and I'd been stitching for most of that...

So we're coming to my stop and I start to pack all my cross stitch stuff up; you know, scissors, threads, aida. Except I can't because I've only gone and stitched the aida to my trousers!!! Well and truly stitched it mind you.  I had to cut it off 😂😂😂

I wasn't laughing at the time - I had visions of me walking through Reading station with this cross stitch of Winnie the Pooh attached to my leg which would have been OK(ish) if it wasn't upside down! Sadly I don't have any photos as this was before the days of smart phones and I'll be honest, it wasn't the first thing that crossed my mind.

Image result for mistakes
Picture credit: lifehacker.com
So, when you're having one of those days where you keep making a mistake, be that misthreading your sewing machine, having to frog your knitting or crochet over and over again, remember that every mistake helps us to learn and get better at our craft and even those who seemingly make no errors will have made a multitude of them.

Next week I'll update you on all the finishes I've managed this month, so until next time,

M x

P.S. For those of you who are wondering, I did manage to finish the Winnie the Pooh corss stitch. It was a card and I believe I gifted it to my Nanna although I never told her about my little train incident as I was too embarrassed. I'm sure she would have found it hilarious though.

Sunday 9 June 2019

An English paper pieced quilt

Some of you have been eagerly awaiting pictures of the finished baby quilt I have made for my beautiful cousin and her first baby who we are all patiently awaiting the arrival of. Well, today was her baby shower so I can now share those pictures with you.

It's been a labour of love, with all the 2 and 1/2 inch hexagons being hand cut, hand basted around the paper templates and then hand stitched together - the English paper piecing method. Incidentally, I hand cut all the individual paper hexagons out too so it has certainly taken some time. I certainly think it was worth it though.

I bought the material back in February, not long after finding out my cousin was expecting. I fell in love with it and just knew it was the right colour palette - suitable for either gender and so soft and peaceful. Bambi is such a gorgeous film with wonderful characters and the 'sweet dreams' message just seemed perfect.


I had a good old look on Pinterest and Instagram for inspiration before deciding on the type of project I was going to make although I was fairly certain I was going to go with a quilt of some description. I'd only tried one other English paper piecing (EPP) project before which was pretty small, so I decided that I'd give a bigger project a go as I had the time before the baby was due. So off I went, printing off and cutting out paper templates and cutting out the fabric hexagons - it was only afterwards that I discovered 'fussy cutting' and there's a part of me that wishes I had known about it before, but I still love how the quilt has turned out. Perhaps I'll do that somewhere down the line.


Then it was time for 'basting' all the fabric hexagons around the paper templates, allowing for a clean edge to hand sew together. I thread basted rather than glued - it worked well and used up some old thread that I didn't have a use for or that I got cheaply as I knew I would be removing it once all the hexagons were stitched together.


Copious amounts of tea were drunk at this point 😂

Followers of my Instagram and Facebook page will have seen a number of progress photos where I was hand stitching each of the hexagons together, but these stopped as I got nearer to completing as (barring the hubby and the kids who share the dining room where I was making the quilt) I wanted my cousin to be the first to see her finished quilt. 


The hubby was fitting some worktop in the kitchen whilst I
was stitching - I don't typically use a saw when I'm sewing 😂


But I don't believe I shared my planned layout:


Once the hexagons were all stitched together, I popped to one of my local fabric shops with the completed quilt top,and selected a gorgeous pale grey cotton fabric for the backing and border of the quilt top - I didn't want to lose any of the pattern from the hexagons. I machine stitched the quilt top to the borders and removed all the thread I had used for basting (what a time consuming job THAT was!).
Reverse of the completed quilt top with
borders prior to adding wadding and
backing fabric

Once the quilt top was completed, I cut out and added some wadding and the backing fabric before sewing together using the same technique you would use for completing a mug rug - cheating perhaps and not traditional quilting style, but I am yet to perfect the art of adding bias binding and I wanted the quilt to look beautifully finished as I had spent so long completing it.

Once that was done, I machine quilted and voila, one completed new baby quilt...


With my cousins permission, here she is opening her gift:


I hope you have enjoyed today's blog post and agree that the quilt has turned out fantastically.

Until next time,

M x


Friday 31 May 2019

May 2019 finishes and WIPs

It's been a busy month which has been book ended by the boys being on school holidays. They only have 7 weeks left when they go back before the end of the school year - when did that happen??

So what have I been up to this month? As I did in April, we'll start with the finishes...


There has been a fair amount of knitting a couple of cards and some sewing all completed this month. First up is the unicorn birthday card I made for my niece who turned 5 this month. She loved it and my sister sent me a lovely video of her opening it. I did have a moment where I felt a little guilty for having coloured it in though and may well add in a picture for her to colour in too next time. Later in the month one of my neighbours lost his mum. She was 99 years old and had been unwell for a time, so it was expected but I still think it's important to mark it in some way and let their family know you are thinking of them. so I made a card with a simple lily design - I believe the thought was appreciated.

Knitting wise I finished the test knit for Craft it like Katie and if you fancy the pattern I believe it is going to be released shortly. It's a fairly straightforward knitting in the round project (no sewing up, yay!) and I had great fun making the pompom, reminiscing with Master L about how we used to make them when I was at school. I went old school with making the pompom too as I don't have one of these fancy pompom makers you can get now - it took a little while but I was pleased with the result. I also started (and finished) a jumper for little Miss which matches mine as I'd over-estimated the amount of wool I needed for mine and had a good 250 grams spare. It's turned out well and she absolutely loves it. When she's wearing it she strokes the front over her tummy saying "mine" - so cute!

I have also finished the Bambi themed baby quilt for my cousin's first baby who is due to arrive in a couple of months. The plan is to give it to my cousin at her baby shower so as she hasn't seen it yet, I'm only giving a sneak peak. I'll be releasing a blog post after the baby shower though with more details (and pics). It's been a labour of love at times with it being English paper piecing, but I have to admit I've really enjoyed doing it and am so, so pleased with how it has turned out - hopefully my cousin will be too.


I also want to add in here something that Master L has made as his teacher appreciation gift this year. I'm really proud of him as he did it himself (with a little guidance from me) and he has done a fantastic job. His stitching is really neat and I would definitely encourage people to let their kids have a go at some of the more complex crafts - they may just surprise you as he did me. Isn't it fantastic? It's a mug rug (albeit a slightly larger one) and as his teacher is quite in to things like that I'm positive she will love it.

OK, so on to the works in progress. I'm still going with the Lake Baikal cross stitch and am now almost half way there. The plan is to get to halfway by the end of June which at my current rate should be more than achievable. I just need to master the French knot. I've found a useful YouTube video so fingers crossed I'll crack it and if not my hubby has successfully managed it so he can do them 😂😂😂


I'm working on a bookmark for Master G's teacher for the end of the yearn (I fully expect this to be finished in June ready for July). I saw the concept on Instagram somewhere and tweaked it to suit my crafting abilities. Master G likes it and feels his teacher will so I'm happy with that.


I've also started work on a 'virus' blanket using the final lengths of yarn leftover from making mine and little Miss's jumper (yes, even after knitting up 2 jumpers I still had some leftover ha ha). I've bought 2 additional colours of yarn to add to it and am working it up with an 'ombre' effect. It's looking really nice, but this one isn't to keep - assuming I can get it away from little Miss. This one is going to be for sale when finished and will hopefully be the start of my new business. I have a number of ideas that I;m working on for this so I guess the business itself is a 'work in progress'. I'll keep you posted on that one 😀

Well that's us all up to date for the month.

Until next time,

M x

Friday 3 May 2019

Cushion cover tutorial

As if it's been a week already! Time is literally flying past this year and even though I'm having some really productive days, I can sit down to write a blog post and wonder what I've actually achieved in the past week.

I've been carrying on with my two works in progress and am adding another to the pile at the weekend as I'm doing a test knit for the fabulous Katie from Craft it like Katie. Have to admit I'm really excited about it; it's my first time doing a test knit for someone other than myself (can you do a test knit for yourself?) and I'm hoping that it will help me develop my knowledge and skills even further as I offer to do more.

So for this week, as I'm trying to save finished projects for one monthly blog post and thereby reduce the pressure to finish something every week, I thought I'd share how I made the cushion covers I finished last month.


Cushion Cover Tutorial
Step 1: I made the front of the cushion cover first by cutting eight 2.5 inch wide strips and two 1.25 inch wide strips of the fabric I wanted to use. Each of the strips was 18 inches long. Using a 0.25 inch seam allowance I joined the strips together along the longest sides in the pattern I wanted for the front of the cushion cover. I then did a line of top stitching on either side of the fabric strips to give the impression of quilting without actually quilting the cover. The final measurements for the front cover were 18 x 18 inches


Step 2: I then constructed the back of the cushion. I cut out two panels to create the envelop backing: these were 18 x 13 and 18 x 14 inches. I turned a small double hem and top stitched two rows of stitching to secure. I used two rows as I prefer the way this looks and I also find that it stops any curling of the edges. I'll confess that I didn't press the hems before sewing them (I was being very lazy) but I'd recommend that you do this before stitching - it gives a cleaner edge and can often make it easier to sew too. 


Step 3: I then pinned the three pieces of the cushion, right sides facing, together. You will have a reasonably sized overlap on the back of the cushion with the two pieces of fabric that form the cushion back. When pinning you need to make sure that all the raw edges are together, and the two hemmed sides of the cushion cover back are towards the middle to create the opening. (stupidly I didn't take a photo of this step). You then sew all the way around the cushion cover with a 0.25 inch seam allowance. 

Step 4: Finally, very carefully trim the corners of your cushion cover (inside the seam allowance) removing a small triangle at each corner. Turn your cushion cover the right way round and voila! A finished cushion cover of your own creation 😀


Right that's me for the week. I'm off to carry on with my works in progress and plan something exciting that I'm hoping to launch in the next few months. Have a great weekend, a fabulous week and I'll see you next Friday.

Until next time,

M x 

Friday 26 April 2019

April 2019 finishes and WIPs

Hi! It's been busy this month with 3 birthdays in the house: little miss turned 2, Master G turned 10 and the hubby celebrated the big 40. That combined with Easter and the school holidays has made for a rather hectic household. I've still managed to find some time to do some crafting though. First of all, lets look at the finishes...

Please ignore the state of my kitchen
walls; we're mid refit
I don't know about you, but I really struggle in high street stores and supermarkets to find a card that I like nowadays.  If I do they seem to be pretty expensive for what is, realistically, a mass produced card. I don't mind paying a little extra for a handmade card from one of the many fabulous sellers that are around, but I quite often leave it too late and end up making my own. With birthday cakes, I usually have a request put in from the person whose birthday it is for my triple layer chocolate cake, and little miss A loves to help. I totally messed up with her birthday cake and forgot to add in the cocoa powder so she ended up with a triple layer jam sponge with icing and sprinkles on top. It still tasted good 😀


I've also (finally) finished the cushion covers that I started back in November last year. The fabric for the front of the pillows is from a pack of fat quarters I've had for a few years and used in a couple of other projects including a quilt for my bed and a sewing machine cover. I picked up the fabric for the back a couple of months ago from Hobbycraft. I've created a faux quilted front which I've then attached to the backing fabric to create an envelope style cushion cover (no zips, woohoo!). I'm pleased with the results and happy to finally have covered pillow inserts on my bed after having them uncovered for so long.


For work in progress (or WIPs), I'm still plugging away on the Lake Baikal cross stitch and making some good progress, nearing half way now. I've been pretty tired of an evening this week as we've been busy making memories during the day so I've been working more on my other WIP, the gorgeous new baby quilt I'm making for my cousin who is due in July.  It's a little easier on the brain as I can just add a few hexies of an evening and I don't need to read a chart or check I'm using the right colour thread like I do with the cross stitch. Baby is due in July so I also need to get my skates on with it!


I shared this photo on Instagram last weekend and was overwhelmed with the response it got. The fabric is super cute and I can't wait to show you all the finished quilt although that may be a little time yet (hopefully before baby makes their appearance though).

So that's us all caught up.  I'm off to play with the kids  now that the sun has reappeared after a wet and miserable day yesterday.

Until next time,

M x